The banjo is a versatile and exciting instrument that has been captivating audiences for centuries. With its unique twangy sound, the banjo has found its place in various genres of music, from folk and bluegrass to country and even rock. If you’re a banjo beginner looking to take your first steps into this fascinating world, you’ve come to the right place! In this guide, we will walk you through the basics of playing the 5-string banjo, from understanding its parts to learning your first few chords. So, let’s pick it up and get started!
The Anatomy of a Banjo
Before we dive into playing, let’s familiarize ourselves with the different parts of a 5-string banjo. Understanding the instrument’s anatomy will help you follow along with tutorials and communicate effectively with other banjo players.
-
Pot and Resonator: The pot is the circular body of the banjo, often made of wood or metal, with a hollow space inside. Some banjos also have a resonator, a back cover attached to the pot, which helps project the sound.
-
Fingerboard: Also known as the neck, this long, slender part is where you place your fingers to create different notes and chords.
-
Peghead: Located at the end of the neck, the peghead houses the tuning pegs that adjust the tension of the strings.
-
Tuning Pegs: These knobs at the peghead are used to tighten or loosen the strings, allowing you to tune your banjo to the desired pitch.
-
Frets: Metal strips embedded along the fingerboard that divide it into distinct segments. Pressing the strings against the frets changes the pitch of the notes.
-
Strings: The banjo typically has five strings, usually made of metal or plastic. The fifth string, known as the drone string, runs halfway up the fingerboard and helps create the signature banjo sound.
Picking the Right Banjo
When starting your banjo journey, it’s important to choose the right instrument to suit your needs. Here are a few factors to consider:
-
Type of Banjo: There are different types of banjos, but as a beginner, you’ll most likely want to start with a 5-string banjo. It’s the most common type and offers a wide range of musical possibilities.
-
Budget: Determine how much you’re willing to invest in your banjo. There are models available for a range of budgets, so ample options should be available to you.
-
Playability: Visit a music store and try out different banjos to see how they feel in your hands. Look for a banjo with a comfortable neck and a good action (the distance between the strings and the fingerboard).
-
Sound: Each banjo has its own unique tone. Listen to recordings or watch videos to find a sound that resonates with you.
-
Ask for Advice: Seek guidance from experienced banjo players or music store professionals who can point you in the right direction.
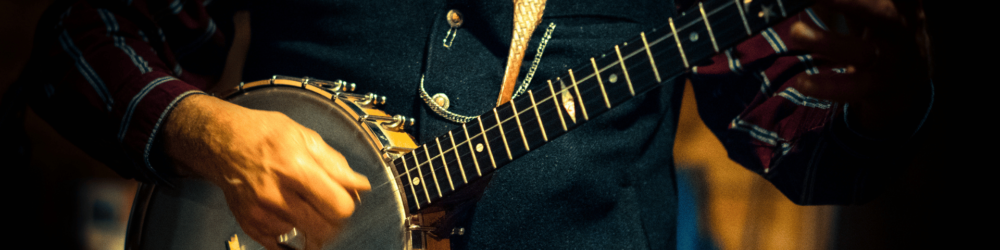
Getting Started: Holding the Banjo
Now that you have your banjo, let’s learn how to hold it correctly. Proper positioning and posture will help you play comfortably and efficiently.
-
Sit or Stand: You can either sit or stand while playing the banjo. Find what works best for you, ensuring you can hold the instrument securely.
-
Positioning the Banjo: Rest the pot of the banjo against your torso, and angle the neck upward at about a 45-degree angle. Keep the banjo steady with your strumming arm.
-
Left-Hand Position: Place your left-hand fingers lightly on the strings above the first few frets. Your thumb should rest comfortably on the back of the neck, opposite your fingertips.
-
Right-Hand Position: Use your dominant hand to strum or pick the strings. Many beginners start with a plectrum (a banjo pick) or their bare fingers for a softer sound. Experiment with different techniques to find what suits you best.
Learning Your First Chords
Now that you’re comfortably holding the banjo, let’s dive into playing your first few chords. Chords are a combination of two or more notes played simultaneously and form the backbone of a song.
-
Open G Tuning: The most common tuning for the 5-string banjo is called Open G tuning (from the top string to the bottom: G, D, G, B, D). Make sure your banjo is properly tuned before you start practicing.
-
G Chord: The G chord is a great place to start. Place your index finger on the second string at the second fret, your middle finger on the fourth string at the second fret, and leave the rest of the strings open. Strum from the fifth string downward, avoiding the first string.
-
C Chord: To play the C chord, place your ring finger on the fourth string at the fifth fret, followed by your middle finger on the second string at the fourth fret. Leave the rest of the strings open. Strum from the fourth string downward.
-
D Chord: To play the D chord, place your index finger on the third string at the second fret, your ring finger on the first string at the third fret, and your middle finger on the second string at the third fret. Leave the fourth and fifth strings open. Strum from the fourth string downward.
Where Do I Go From Here?
Congratulations! You’ve taken your first steps into the world of banjo playing. Remember, practice is key! Start by playing these chords slowly and clearly, gradually increasing your speed as you become more comfortable. As you gain confidence, explore more chords, fingerpicking techniques, and learn to read tablature or sheet music.
Consider joining a local banjo group or seeking online tutorials and resources to further enhance your skills. The banjo community is warm, welcoming, and always eager to help eager learners like yourself.
So, keep strumming, keep picking, and enjoy the journey of discovering the rich and vibrant world of the banjo. Happy playing!
*Note: The banjo offers endless opportunities for exploration and experimentation. This guide is meant to provide a starting point.